| OrangePi PC 玩Linux主线内核踩坑之旅(一)之制作第一个镜像 | 您所在的位置:网站首页 › 树莓派 内核头文件 › OrangePi PC 玩Linux主线内核踩坑之旅(一)之制作第一个镜像 |
OrangePi PC 玩Linux主线内核踩坑之旅(一)之制作第一个镜像
|
今天开始写一个专题《OrangePi PC 玩Linux主线内核》。一方面是记录自己在踩坑过程中的点点滴滴,另一方面是分享自己的心得。目前还不确定要写几期,希望大家多多捧场。 首先简单介绍一下OrangePi PC。OrangePi PC(香橙派平板)是一款开源的单板电脑,新一代的arm开发板,它可以运行Android4.4、Ubuntu、Debian等操作系统。香橙派平板使用全志H3系统级芯片,同时拥有1GB DDR3 内存。产品具体细节可以访问http://www.orangepi.cn/orangepipc/index_cn.html查看。
主线内核(mainline kernel)是由Linus Torvalds亲自维护的内核发布版[1]。既然是Linux之父亲自维护的,那内核版本一定总是最新的。虽然win10不一定比win7好,但你一定不会去用win95,最新的版本总是代表了当下最优的发展方向。 二、开发环境搭建 2.1 硬件环境PC一台,OrangePi PC一块,8G tf卡一张,USB转串口线一条。 2.2 软件环境 操作系统:Deepin V20 应用软件:buildroot-2020.11.tar.bz2 gcc-linaro-7.5.0-2019.12-x86_64_arm-linux-gnueabihf.tar.xz balenaEtcher-1.5.45-x64.AppImage 所有用到的软件我都会提供网盘下载链接。 三、用Buildroot构建第一个主线内核镜像 3.1 什么是BuildrootBuildroot是一个简单、高效且易于使用的工具,可通过交叉编译来生成嵌入式Linux系统[2]。你可以和编译Linux内核一样,通过buildroot配置,menuconfig修改,编译出一个完整的可以直接烧写到机器上运行的Linux系统软件(包含boot、kernel、rootfs以及rootfs中的各种库和应用程序)[3]。 以前看好多嵌入式Linux书籍都是从裸机开始讲起,光是芯片手册就能占去1/3,接着是讲uboot,又是1/3,最后的内核、根文件系统以及应用加起来占1/3,反正越是需要作者着墨的地方作者越惜墨,学习者往往越看越没兴趣,越看越不知所云。其实,这都是因为作者没能把握好内容的重点。说实话,我学习嵌入式Linux的时候也是一开始信心满满,越看书越懵逼,很难将书本上的知识与实际相连接。对于初学者而言,更需要的是阶段性的成功,先跳过一大堆底层的、深奥的知识,从容易上手的、便于直接开始应用的层面着手,更容易增强信心,加深学习兴趣。而Buildroot就是这样一个工具,可以流水线般完成uboot、mainline kernel以及根文件系统的编译和镜像制作,初学者很快就可以把linux跑起来,大大降低了学习门槛。 3.2 用Buildroot制作镜像官方下载网址:https://buildroot.org/download.html 可以使用git拉取:git clone git://git.buildroot.net/buildroot (说实话,用git下载能把人气死,我一般不用这种方法。如果你在网络好的地方那另当别论。) 截至今日(2020年12月4日),最新稳定版是buildroot-2020.11.tar.bz2。将其下载到桌面并解压。多说一点,现在的linux系统大都比较方便,右击压缩包就可以解压,比敲命令还是要省事不少。 双击打开buildroot-2020.11文件夹,可以看到有个board目录,这里存放着各种常见的“派”的配置文件夹,如树莓派,荔枝派,还有我们的香橙派。 dpmicro@dpmicro-PC:~/Desktop/buildroot-2020.11$ ls board/orangepi/ orangepi-lite orangepi-one-plus orangepi-pc-plus orangepi-r1 orangepi-zero orangepi-lite2 orangepi-pc orangepi-plus orangepi-rk3399 orangepi-zero-plus orangepi-one orangepi-pc2 orangepi-prime orangepi-win orangepi-zero-plus2可以看到,连最新的OrangePi4(orangepi-rk3399)也有了,极大地方便了初学者和极客进行开发。我们这里查看orangepi-pc目录下的readme.txt OrangePi PC Intro ===== This default configuration will allow you to start experimenting with the buildroot environment for the OrangePi PC. With the current configuration it will bring-up the board, and allow access through the serial console. How to build it =============== Configure Buildroot: $ make orangepi_pc_defconfig Compile everything and build the SD card image: $ make How to write the SD card ======================== Once the build process is finished you will have an image called "sdcard.img" in the output/images/ directory. Copy the bootable "sdcard.img" onto an SD card with "dd": $ sudo dd if=output/images/sdcard.img of=/dev/sdX 按照readme.txt的说明,生成可烧录的镜像就2步,首先执行make orangepi_pc_defconfig配置buildroot,然后make就可以了,最后用dd将镜像文件写入TF卡。回到buildroot-2020.11目录,在终端下执行 make orangepi_pc_defconfig dpmicro@dpmicro-PC:~/Desktop/buildroot-2020.11$ make orangepi_pc_defconfig mkdir -p /home/dpmicro/Desktop/buildroot-2020.11/output/build/buildroot-config/lxdialog PKG_CONFIG_PATH="" make CC="/usr/bin/gcc" HOSTCC="/usr/bin/gcc" \ obj=/home/dpmicro/Desktop/buildroot-2020.11/output/build/buildroot-config -C support/kconfig -f Makefile.br conf make[1]: 进入目录“/home/dpmicro/Desktop/buildroot-2020.11/support/kconfig” /usr/bin/gcc -DCURSES_LOC="" -DLOCALE -I/home/dpmicro/Desktop/buildroot-2020.11/output/build/buildroot-config -DCONFIG_=\"\" -MM *.c > /home/dpmicro/Desktop/buildroot-2020.11/output/build/buildroot-config/.depend 2>/dev/null || : /usr/bin/gcc -DCURSES_LOC="" -DLOCALE -I/home/dpmicro/Desktop/buildroot-2020.11/output/build/buildroot-config -DCONFIG_=\"\" -c conf.c -o /home/dpmicro/Desktop/buildroot-2020.11/output/build/buildroot-config/conf.o /usr/bin/gcc -DCURSES_LOC="" -DLOCALE -I/home/dpmicro/Desktop/buildroot-2020.11/output/build/buildroot-config -DCONFIG_=\"\" -I. -c /home/dpmicro/Desktop/buildroot-2020.11/output/build/buildroot-config/zconf.tab.c -o /home/dpmicro/Desktop/buildroot-2020.11/output/build/buildroot-config/zconf.tab.o /usr/bin/gcc -DCURSES_LOC="" -DLOCALE -I/home/dpmicro/Desktop/buildroot-2020.11/output/build/buildroot-config -DCONFIG_=\"\" /home/dpmicro/Desktop/buildroot-2020.11/output/build/buildroot-config/conf.o /home/dpmicro/Desktop/buildroot-2020.11/output/build/buildroot-config/zconf.tab.o -o /home/dpmicro/Desktop/buildroot-2020.11/output/build/buildroot-config/conf rm /home/dpmicro/Desktop/buildroot-2020.11/output/build/buildroot-config/zconf.tab.c make[1]: 离开目录“/home/dpmicro/Desktop/buildroot-2020.11/support/kconfig” # # configuration written to /home/dpmicro/Desktop/buildroot-2020.11/.config #按理来说,接下来就应该执行make了,但是还不行。我们需要配置能在Deepin下运行,并用于编译产生ARM Cortex-A7平台可用文件的GCC,也就是传说中的交叉编译器。能用来交叉编译的工具有多个选择,我们选用linaro推出的GCC,我个人体验很不错。官网地址:https://www.linaro.org/downloads/
还是那句话,如果你网络不好,从我的网盘下载吧,否则慢到你怀疑人生。 下载gcc-linaro-7.5.0-2019.12-x86_64_arm-linux-gnueabihf.tar.xz到桌面,解压,然后我们把解压后的文件夹移动到/opt/目录下。这个路径不是必须的,你可以任意指定,只不过按照Deepin的规则,统一放到/opt/目录下方便管理。移动到这个目录需要管理员权限,因此加上sudo。 dpmicro@dpmicro-PC:~/Desktop$ sudo mv gcc-linaro-7.5.0-2019.12-x86_64_arm-linux-gnueabihf/ /opt/接下来添加环境变量,将GCC的路径添加到系统变量中。 dpmicro@dpmicro-PC:~/Desktop$ sudo nano /etc/profile在export PATH上方添加一行 PATH=$PATH:/opt/gcc-linaro-7.5.0-2019.12-x86_64_arm-linux-gnueabihf/bin 重启使环境变量生效。 # /etc/profile: system-wide .profile file for the Bourne shell (sh(1)) # and Bourne compatible shells (bash(1), ksh(1), ash(1), ...). if [ "`id -u`" -eq 0 ]; then PATH="/usr/local/sbin:/usr/local/bin:/usr/sbin:/usr/bin:/sbin:/bin" else PATH="/usr/local/bin:/usr/bin:/bin:/usr/local/games:/usr/games:/sbin:/usr/sbin" fi PATH=$PATH:/opt/gcc-linaro-7.5.0-2019.12-x86_64_arm-linux-gnueabihf/bin export PATH if [ "$PS1" ]; then if [ "$BASH" ] && [ "$BASH" != "/bin/sh" ]; then # The file bash.bashrc already sets the default PS1. # PS1='\h:\w\$ ' if [ -f /etc/bash.bashrc ]; then . /etc/bash.bashrc fi else if [ "`id -u`" -eq 0 ]; then PS1='# ' else测试环境变量是否添加成功。 dpmicro@dpmicro-PC:~/Desktop$ arm-linux-gnueabihf-gcc -v Using built-in specs. COLLECT_GCC=arm-linux-gnueabihf-gcc COLLECT_LTO_WRAPPER=/opt/gcc-linaro-7.5.0-2019.12-x86_64_arm-linux-gnueabihf/bin/../libexec/gcc/arm-linux-gnueabihf/7.5.0/lto-wrapper Target: arm-linux-gnueabihf Configured with: '/home/tcwg-buildslave/workspace/tcwg-make-release_1/snapshots/gcc.git~linaro-7.5-2019.12/configure' SHELL=/bin/bash --with-mpc=/home/tcwg-buildslave/workspace/tcwg-make-release_1/_build/builds/destdir/x86_64-unknown-linux-gnu --with-mpfr=/home/tcwg-buildslave/workspace/tcwg-make-release_1/_build/builds/destdir/x86_64-unknown-linux-gnu --with-gmp=/home/tcwg-buildslave/workspace/tcwg-make-release_1/_build/builds/destdir/x86_64-unknown-linux-gnu --with-gnu-as --with-gnu-ld --disable-libmudflap --enable-lto --enable-shared --without-included-gettext --enable-nls --with-system-zlib --disable-sjlj-exceptions --enable-gnu-unique-object --enable-linker-build-id --disable-libstdcxx-pch --enable-c99 --enable-clocale=gnu --enable-libstdcxx-debug --enable-long-long --with-cloog=no --with-ppl=no --with-isl=no --disable-multilib --with-float=hard --with-fpu=vfpv3-d16 --with-mode=thumb --with-tune=cortex-a9 --with-arch=armv7-a --enable-threads=posix --enable-multiarch --enable-libstdcxx-time=yes --enable-gnu-indirect-function --with-build-sysroot=/home/tcwg-buildslave/workspace/tcwg-make-release_1/_build/sysroots/arm-linux-gnueabihf --with-sysroot=/home/tcwg-buildslave/workspace/tcwg-make-release_1/_build/builds/destdir/x86_64-unknown-linux-gnu/arm-linux-gnueabihf/libc --enable-checking=release --disable-bootstrap --enable-languages=c,c++,fortran,lto --build=x86_64-unknown-linux-gnu --host=x86_64-unknown-linux-gnu --target=arm-linux-gnueabihf --prefix=/home/tcwg-buildslave/workspace/tcwg-make-release_1/_build/builds/destdir/x86_64-unknown-linux-gnu Thread model: posix gcc version 7.5.0 (Linaro GCC 7.5-2019.12)出现上述提示表明添加成功。下面使用make menuconfig进行配置。 dpmicro@dpmicro-PC:~/Desktop/buildroot-2020.11$ make menuconfig mkdir -p /home/dpmicro/Desktop/buildroot-2020.11/output/build/buildroot-config/lxdialog PKG_CONFIG_PATH="" make CC="/usr/bin/gcc" HOSTCC="/usr/bin/gcc" \ obj=/home/dpmicro/Desktop/buildroot-2020.11/output/build/buildroot-config -C support/kconfig -f Makefile.br mconf make[1]: 进入目录“/home/dpmicro/Desktop/buildroot-2020.11/support/kconfig” *** Unable to find the ncurses libraries or the *** required header files. *** 'make menuconfig' requires the ncurses libraries. *** *** Install ncurses (ncurses-devel or libncurses-dev *** depending on your distribution) and try again. *** make[1]: *** [Makefile:253:/home/dpmicro/Desktop/buildroot-2020.11/output/build/buildroot-config/dochecklxdialog] 错误 1 make[1]: 离开目录“/home/dpmicro/Desktop/buildroot-2020.11/support/kconfig” make: *** [Makefile:969:/home/dpmicro/Desktop/buildroot-2020.11/output/build/buildroot-config/mconf] 错误 2啊哦,需要安装ncurses库,按照提示来就好。 dpmicro@dpmicro-PC:~/Desktop/buildroot-2020.11$ sudo apt-get install libncurses-dev 请输入密码 [sudo] dpmicro 的密码: 验证成功 正在读取软件包列表... 完成 正在分析软件包的依赖关系树 正在读取状态信息... 完成 建议安装: ncurses-doc 下列【新】软件包将被安装: libncurses-dev 升级了 0 个软件包,新安装了 1 个软件包,要卸载 0 个软件包,有 0 个软件包未被升级。 需要下载 329 kB 的归档。 解压缩后会消耗 2,270 kB 的额外空间。 获取:1 https://community-packages.deepin.com/deepin apricot/main amd64 libncurses-dev amd64 6.1+20181013.1-1+dde [329 kB] 已下载 329 kB,耗时 1秒 (645 kB/s) 正在选中未选择的软件包 libncurses-dev:amd64。 (正在读取数据库 ... 系统当前共安装有 260209 个文件和目录。) 准备解压 .../libncurses-dev_6.1+20181013.1-1+dde_amd64.deb ... 正在解压 libncurses-dev:amd64 (6.1+20181013.1-1+dde) ... 正在设置 libncurses-dev:amd64 (6.1+20181013.1-1+dde) ... 正在处理用于 man-db (2.8.5-2) 的触发器 ...现在就可以打开了,如下图所示。
目标配置。主要用于配置目标处理器的架构、二进制格式、内核、ABI、浮点策略、指令集等,这里的参数由orangepi_pc_defconfig(在configs目录下)自动生成,无需改动。 Build options编译配置。这里需要配置的是Mirrors and Download locations选项,改几个下载的网址,不然下载得太慢不利于节能减排。
将上图红框内的网址改成如图所示的国内源。 http://mirrors.ustc.edu.cn/kernel.org/ http://mirrors.ustc.edu.cn/gnu/ http://mirrors.163.com/cpan/ Toolchain工具链。同样需要修改。
首先是Toolchain type,这个要改成External toolchain(外部工具链),也就是使用我们自己准备好的GCC。Toolchain配置为Custom toolchain(自定义工具链)。Toolchain path填写工具链的绝对路径,本例中为/opt/gcc-linaro-7.5.0-2019.12-x86_64_arm-linux-gnueabihf/。Toolchain prefix配置为$(ARCH)-linux-gnueabihf。External toolchain gcc version这个选择GCC的版本,当然是7.x啦。External toolchain kernel headers series这个选择头文件的版本,此处需要查看一下。 dpmicro@dpmicro-PC:~/Desktop/buildroot-2020.11$ cat /opt/gcc-linaro-7.5.0-2019.12-x86_64_arm-linux-gnueabihf/arm-linux-gnueabihf/libc/usr/include/linux/version.h #define LINUX_VERSION_CODE 264707 #define KERNEL_VERSION(a,b,c) (((a) > host-patchelf 0.9 Building PATH="/home/dpmicro/Desktop/buildroot-2020.11/output/host/bin:/home/dpmicro/Desktop/buildroot-2020.11/output/host/sbin:/usr/local/bin:/usr/bin:/bin:/usr/local/games:/usr/games:/sbin:/usr/sbin:/opt/gcc-linaro-7.5.0-2019.12-x86_64_arm-linux-gnueabihf/bin" PKG_CONFIG="/home/dpmicro/Desktop/buildroot-2020.11/output/host/bin/pkg-config" PKG_CONFIG_SYSROOT_DIR="/" PKG_CONFIG_ALLOW_SYSTEM_CFLAGS=1 PKG_CONFIG_ALLOW_SYSTEM_LIBS=1 PKG_CONFIG_LIBDIR="/home/dpmicro/Desktop/buildroot-2020.11/output/host/lib/pkgconfig:/home/dpmicro/Desktop/buildroot-2020.11/output/host/share/pkgconfig" /usr/bin/make -j5 -C /home/dpmicro/Desktop/buildroot-2020.11/output/build/host-patchelf-0.9/ make[1]: 进入目录“/home/dpmicro/Desktop/buildroot-2020.11/output/build/host-patchelf-0.9” Making all in src make[2]: 进入目录“/home/dpmicro/Desktop/buildroot-2020.11/output/build/host-patchelf-0.9/src” g++ -DPACKAGE_NAME=\"patchelf\" -DPACKAGE_TARNAME=\"patchelf\" -DPACKAGE_VERSION=\"0.9\" -DPACKAGE_STRING=\"patchelf\ 0.9\" -DPACKAGE_BUGREPORT=\"\" -DPACKAGE_URL=\"\" -DPACKAGE=\"patchelf\" -DVERSION=\"0.9\" -DPAGESIZE=4096 -I. -I/home/dpmicro/Desktop/buildroot-2020.11/output/host/include -Wall -O2 -I/home/dpmicro/Desktop/buildroot-2020.11/output/host/include -c -o patchelf.o patchelf.cc /bin/bash: g++:未找到命令 make[2]: *** [Makefile:357:patchelf.o] 错误 127 make[2]: 离开目录“/home/dpmicro/Desktop/buildroot-2020.11/output/build/host-patchelf-0.9/src” make[1]: *** [Makefile:436:all-recursive] 错误 1 make[1]: 离开目录“/home/dpmicro/Desktop/buildroot-2020.11/output/build/host-patchelf-0.9” make: *** [package/pkg-generic.mk:250:/home/dpmicro/Desktop/buildroot-2020.11/output/build/host-patchelf-0.9/.stamp_built] 错误 2晕,竟然没有g++,安装之。 dpmicro@dpmicro-PC:~/Desktop/buildroot-2020.11$ sudo apt-get install g++继续。。。 经过漫长的等待,终于下载完了,呃不,编译完了。。。 >>> Executing post-image script support/scripts/genimage.sh board/orangepi/orangepi-pc/genimage.cfg:43: no sub-section title/index for 'config' INFO: cmd: "mkdir -p "/home/dpmicro/Desktop/buildroot-2020.11/output/build/genimage.tmp"" (stderr): INFO: cmd: "rm -rf "/home/dpmicro/Desktop/buildroot-2020.11/output/build/genimage.tmp"/*" (stderr): INFO: cmd: "mkdir -p "/home/dpmicro/Desktop/buildroot-2020.11/output/build/genimage.tmp"" (stderr): INFO: cmd: "cp -a "/tmp/tmp.I9DwEdvhr4" "/home/dpmicro/Desktop/buildroot-2020.11/output/build/genimage.tmp/root"" (stderr): INFO: cmd: "find '/home/dpmicro/Desktop/buildroot-2020.11/output/build/genimage.tmp/root' -depth -type d -printf '%P\0' | xargs -0 -I {} touch -r '/tmp/tmp.I9DwEdvhr4/{}' '/home/dpmicro/Desktop/buildroot-2020.11/output/build/genimage.tmp/root/{}'" (stderr): INFO: cmd: "mkdir -p "/home/dpmicro/Desktop/buildroot-2020.11/output/images"" (stderr): INFO: vfat(boot.vfat): cmd: "dd if=/dev/zero of="/home/dpmicro/Desktop/buildroot-2020.11/output/images/boot.vfat" seek=10485760 count=0 bs=1 2>/dev/null" (stderr): INFO: vfat(boot.vfat): cmd: "mkdosfs '/home/dpmicro/Desktop/buildroot-2020.11/output/images/boot.vfat'" (stderr): INFO: vfat(boot.vfat): adding file 'zImage' as 'zImage' ... INFO: vfat(boot.vfat): cmd: "MTOOLS_SKIP_CHECK=1 mcopy -bsp -i '/home/dpmicro/Desktop/buildroot-2020.11/output/images/boot.vfat' '/home/dpmicro/Desktop/buildroot-2020.11/output/images/zImage' '::'" (stderr): INFO: vfat(boot.vfat): adding file 'sun8i-h3-orangepi-pc.dtb' as 'sun8i-h3-orangepi-pc.dtb' ... INFO: vfat(boot.vfat): cmd: "MTOOLS_SKIP_CHECK=1 mcopy -bsp -i '/home/dpmicro/Desktop/buildroot-2020.11/output/images/boot.vfat' '/home/dpmicro/Desktop/buildroot-2020.11/output/images/sun8i-h3-orangepi-pc.dtb' '::'" (stderr): INFO: vfat(boot.vfat): adding file 'boot.scr' as 'boot.scr' ... INFO: vfat(boot.vfat): cmd: "MTOOLS_SKIP_CHECK=1 mcopy -bsp -i '/home/dpmicro/Desktop/buildroot-2020.11/output/images/boot.vfat' '/home/dpmicro/Desktop/buildroot-2020.11/output/images/boot.scr' '::'" (stderr): INFO: hdimage(sdcard.img): adding partition 'u-boot' from 'u-boot-sunxi-with-spl.bin' ... INFO: hdimage(sdcard.img): adding partition 'boot' (in MBR) from 'boot.vfat' ... INFO: hdimage(sdcard.img): adding partition 'rootfs' (in MBR) from 'rootfs.ext4' ... INFO: hdimage(sdcard.img): writing MBR在 output/images 目录下可以找到打包好的镜像文件
现在把TF卡插到读卡器里,然后再插到电脑的USB口上,我们来把镜像写入TF卡。按照说明文档介绍 How to write the SD card ======================== Once the build process is finished you will have an image called "sdcard.img" in the output/images/ directory. Copy the bootable "sdcard.img" onto an SD card with "dd": $ sudo dd if=output/images/sdcard.img of=/dev/sdX 可以使用dd命令写入。先查看TF卡的设备
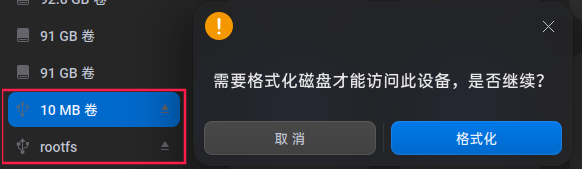
然后输入如下命令 dpmicro@dpmicro-PC:~/Desktop/buildroot-2020.11$ sudo dd if=output/images/sdcard.img of=/dev/sdc卸下sdc,然后插拔一下读卡器,此时电脑会显示两个盘符
其中10MB卷存放boot.scr sun8i-h3-orangepi-pc.dtb zImage,是FAT32格式;rootfs 是根文件系统。但是不知为何,执行一次dd命令会提示10MB卷需要格式化,插拔后再次执行dd,再插拔就好了。每次这样会有些烦,我们使用balenaEtcher来写入镜像,双击即可打开,无需安装。
选择镜像文件,选择写入盘,Flash!即可。然后把TF卡插入香橙派,上电!等等,为了可以与香橙派交互,我们在香橙派的Debug口接上USB转串口模块,与电脑相连。接着在软件商店搜索PuTTY并安装。 查看USB转串口的设备 dpmicro@dpmicro-PC:~/Desktop$ ls /dev/tty* /dev/tty /dev/tty2 /dev/tty31 /dev/tty43 /dev/tty55 /dev/ttyprintk /dev/ttyS2 /dev/ttyS31 /dev/tty0 /dev/tty20 /dev/tty32 /dev/tty44 /dev/tty56 /dev/ttyS0 /dev/ttyS20 /dev/ttyS4 /dev/tty1 /dev/tty21 /dev/tty33 /dev/tty45 /dev/tty57 /dev/ttyS1 /dev/ttyS21 /dev/ttyS5 /dev/tty10 /dev/tty22 /dev/tty34 /dev/tty46 /dev/tty58 /dev/ttyS10 /dev/ttyS22 /dev/ttyS6 /dev/tty11 /dev/tty23 /dev/tty35 /dev/tty47 /dev/tty59 /dev/ttyS11 /dev/ttyS23 /dev/ttyS7 /dev/tty12 /dev/tty24 /dev/tty36 /dev/tty48 /dev/tty6 /dev/ttyS12 /dev/ttyS24 /dev/ttyS8 /dev/tty13 /dev/tty25 /dev/tty37 /dev/tty49 /dev/tty60 /dev/ttyS13 /dev/ttyS25 /dev/ttyS9 /dev/tty14 /dev/tty26 /dev/tty38 /dev/tty5 /dev/tty61 /dev/ttyS14 /dev/ttyS26 /dev/ttyUSB0 /dev/tty15 /dev/tty27 /dev/tty39 /dev/tty50 /dev/tty62 /dev/ttyS15 /dev/ttyS27 /dev/tty16 /dev/tty28 /dev/tty4 /dev/tty51 /dev/tty63 /dev/ttyS16 /dev/ttyS28 /dev/tty17 /dev/tty29 /dev/tty40 /dev/tty52 /dev/tty7 /dev/ttyS17 /dev/ttyS29 /dev/tty18 /dev/tty3 /dev/tty41 /dev/tty53 /dev/tty8 /dev/ttyS18 /dev/ttyS3 /dev/tty19 /dev/tty30 /dev/tty42 /dev/tty54 /dev/tty9 /dev/ttyS19 /dev/ttyS30最后一个/dev/ttyUSB0便是。打开PuTTY,按下图配置
选中Default Settings并点击Save可以将配置保存为默认配置,最后点击Open。给板子上电。
这是什么鬼?折腾了半天,发现是权限不足的问题。。。在Deepin V15上可不是这样的,看来20收紧了权限控制。 先来创建提权配置文件[5] dpmicro@dpmicro-PC:~$ cd /usr/share/polkit-1/actions dpmicro@dpmicro-PC:/usr/share/polkit-1/actions$ sudo nano org.chiark.putty.policy在新建的文件中创建如下配置 org.chiark.putty https://www.deepin.com/ Authentication is required to run the putty putty 需要进行身份验证 no no yes /opt/apps/org.chiark.putty/files/bin/putty true接下来需要修改desktop文件 dpmicro@dpmicro-PC:/usr/share/polkit-1/actions$ cd /usr/share/applications dpmicro@dpmicro-PC:/usr/share/applications$ sudo nano org.chiark.putty.desktop在Exec=这一行的路径前添加pkexec (此处有空格)
好,再运行试试。。。OK!给香橙派正式上电!
系统顺利跑起来了!输入root回车即可登陆。第一期就先到这里,完成我们探索主线内核的第一步。 四、补充 4.1 文中用到的软件包移动的网盘,和彩云。虽然需要注册一下,但至少不限速,还是让人舒畅不少。 链接: https://caiyun.139.com/m/i?0c5Cg6ku3wYS0 提取码:HqAG 复制内容打开和彩云手机APP,操作更方便哦
如果完全按照本文上述的配置进行编译,你会发现很多包还是很难下载,毕竟各种开源的软件不是集中放在哪一个网站上的,仅仅修改几处网址也是收效甚微。各位网友应该已经注意到了,上面提供的网盘中有个dl.zip压缩包
下载这个压缩包,将其解压到buildroot-2020.11目录下,这里面包含着的软件包就是本节文档所需的全部包,如此一来,在make时便不会再去国外网站下载了。可能有人已经发现了,在Build options下有个Download dir配置项
可见,默认的包下载目录就是dl文件夹。我们也无需改动此配置,以后遇到难以下载的包,可以使用其它离线下载工具下载后,放置到dl目录下即可。虽然不能完全解决下载慢的问题,但总比盯着屏幕傻等要好的多。 参考文献[1]https://blog.csdn.net/qq_43550613/article/details/83536118 [2]https://buildroot.org/ [3]https://www.cnblogs.com/kele-dad/p/8231434.html [4]https://blog.csdn.net/haimo_free/article/details/107828155 [5]https://bbs.deepin.org/post/151900#mod=viewthread&tid=151900 |


【本文地址】